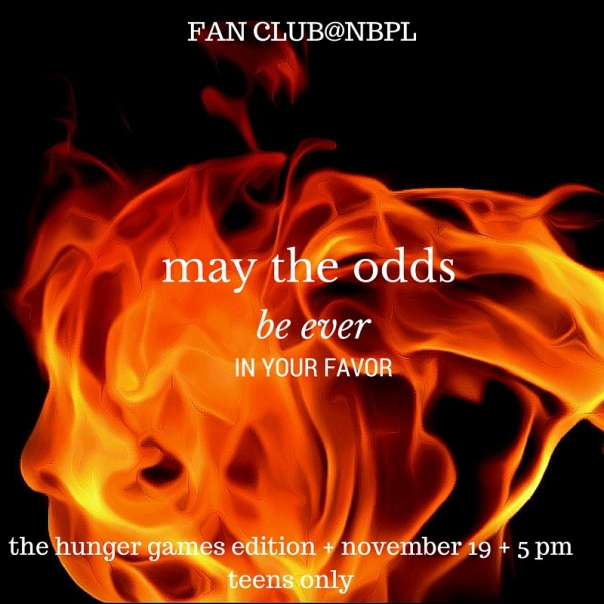
Puzzling Puzzles and the Puzzlers Who Solve Them: Scavenger Hunt at the Library

The Big Idea

I was really struggling with what to do for our puzzle club. It seemed like a really good idea when I was planning, but actually coming up with puzzles that are engaging for a large group was a lot harder than I thought. Our digital services librarian had recently done a scavenger hunt for Power Up Your Library week, so I decided to use that framework and send the kids around the library.

What We Did

I had two options for the scavenger hunt. I hunted down (ha!) a library scavenger hunt from a blog that had a variety of things to do around the library, like finding the juvenile magazines, introducing yourself to the librarian, and finding a biography of someone from a different culture. I printed several of these out, and put them on clipboards. I also had three iPads that I had loaded up with Klikaklu. Klikaklu is an app our digital services librarian found that’s pretty awesome. I believe she paid around $15 for our scavenger hunt, which we’ve used for several events. Once you pay for the hunt, patrons can do the hunt for free using either library iPads or their own devices. Although I believe it’s now available on Android, at the time, it was only available on iOS devices. The cool think about Klikaklu is that you can add pictures of places and ask people to match up a second picture of the same thing, can add trivia questions, and lots of other ways to interact. It’s a really cool way to get people to explore the library.

How It Went

Honestly, this program probably could have been thought through a little better! The kids definitely LOVED the scavenger hunt, but I should have taken the time to make my own paper hunt, instead of taking the slightly lazy way out and printing a premade generic one. One of our iPads was also being really slow, and didn’t work very well. I will say that the patrons really had fun and explored the library in a new way. I was sure to warn staff that the tweens would be wandering around the library, and made sure to advise the tweens of the rules of the library. They were super respectful of the rules of the space and nobody was disturbed (that I know of!)

What It Cost

Since we had already paid for the Klikaklu hunt, this program was free! If you didn’t have a wonderful digital services librarian who had done this for you, you could pay the $15 for the hunt, or you could just use paper scavenger hunts.

Full STEAM Ahead: The Moon

I do a weekly tween program here at the library, and it’s really hard to find other library folks who spell out what their tween programming is. So I’m going to start blogging about what we’re doing. I’ll try to both stay current as I do new things and work backwards, so eventually there will be over a year’s worth of weekly programs to peruse. So here we go!

What’s the Big Idea:

When I originally planned this program topic, we were going to end our week with a big all-ages event to celebrate International Observe the Moon Night on October 28th. When I sat down to do the planning for that event, however, I saw that there was going to be another huge free event in our town, and I just didn’t want to compete with that! I still moved forward with our moon theme, but, like the cheese, it stood alone. I’d done a space theme program with a lot of these same kids last year, so I wanted to come up with some different stuff that was fun.

What We Did:

We started with a really cool game format I found on Teachers Pay Teachers called “I Have, Who Has” (As a sidenote, I’ve found that TPT is a really cool resource that saves me a ton of time for not too much money. The quality can definitely vary, but there is so much high quality stuff on there. Has anyone ever heard of this game? You print off the sheets that are provided, cut them up into individual cards, and then shuffle them up. When the kids came in, I gave them out the included notes sheet and read over it with them. Then I gave out the cards (we are a small group, so each kid got two or three). The kid with the first card (it says, “this is the first card”, so that makes it easy) reads their card, which says, “I have the first card! Who has the distance to the moon in miles?” Then, the kid with the card that has the card with the distance will pipe up and say, “I have 238,900. Who has the number of stages the moon goes through?” And so on. It’s fun, and the kids have to listen to each other and also look up the facts. We played through once, then I took up the cards and we transitioned to another thing.

Our big craft was a constellation jar inspired by this one on Design Mom. If you don’t follow the link, that really cool craft is made with a mason jar, a disposable cake pan, and an awl. All of which I foolishly tried to do as an example and LOLOLOL NOPE. There is no timeline in which I give tweens SUPER SHARP pieces of metal and a pokey metal poker. Instead, I headed over to my favorite store for programming (The Dollar Tree) and picked up two rolls of aluminum foil, a few packs of battery powered votives, and a straight sided cylindrical vase for each kid. I also printed some of these constellation maps. When it came time to make the craft, I gave each kid a piece of cardboard as a work surface, a piece of pre-cut aluminum foil, and a pushpin. I showed them how to layer the protective cardboard, then the foil, and finally the constellation map. Then, they used their push pin to poke through the paper and the foil, stopping when they hit the cardboard. We disposed of the poked up paper, and I helped them wrap the foil around the inside of the vase. They then popped in the electric votive, and when the lights are off, these vases look AMAZING. It’s super easy to change the constellations in the future for the kids, the parents can replace the votives or add a stronger light if they’d prefer, and it’s just a neat thing!

After all the tweens were done, I passed out the I Have/Who Has cards again, and we tried to get through them as fast as we could. It was super fun and the the group was clamoring to play it again.

How It Went

This was a great program! The constellation jars aren’t really THAT related to the moon, and I had a couple other things I was thinking we could do, but the tweens loved the constellation jars so much and were working on them so intently that I didn’t have the heart to move to a different project. Apparently there are lots of other I Have/Who Has games out there, and they are a really fun way to teach kids in this informal setting without making them listen to me ad nauseum.

What It Cost

  • $1 per kid for the glass vases
  • $2 for the group for the aluminum foil
  • $.50 for each votive
  • $2.50 for the TPT file

Overall, the most expensive part of the program was the vases for the constellation jars. If you can source mason jars or even get recycled glass donations, that would bring the price down quite a bit!

Drop In and Hang Out: Take What You Need; Leave What You Can

drop-in-and-hang-out-take-what-you-need-leave-what-you-can

As I mentioned in a previous post, our teens are feeling pretty stressed out lately. Between exams, family stuff, and the holidays, it can be one of the hardest times of the year. We’re also feeling the holiday pinch in terms of staffing, so I wanted something that addressed the teens’ feelings and was easy for me to do. I ended up finding a page of printable fortune cookie sayings for kids  which were also applicable to teens. I printed up a few pages of the sayings, along with a few blank slips. I cut the slips apart, folded them, and put them in the teen area. In a separate bin, I put the empty strips. We already have markers, pens, and colored pencils in the teen area. I am hopeful the teens will create their own encouragements to leave, and will find something that will make them feel better in the meantime.

I hope all one of my readers out there are having Decembers that aren’t too stressful, too!

Drop In and Hang Out: Artist Trading Cards


A super easy passive/sneak program for teens

Here’s a real lazy days passive program for you: artist trading cards. We’ve done this program both as a scheduled program and as a passive program before, and it’s pretty durn easy.


The first thing you need to do is make or procure some blank cards. You have a lot of options for this! You can pick up a pack of blank business cards, purchase a pack of blank playing cards, or even just cut up some cardstock into playing card-sized rectangles. This particular program was inspired by my scrounging around in our passive program supplies and turning up a couple of packs of Scratch-art trading cards we bought for a scratch art program almost a year ago. I whipped up a quick sign, put out two little containers (one for new cards and one for arted-up cards, and BOOM.

If you haven’t heard of artist trading cards, I’ll be a bad librarian and point you over to Wikipedia for the history of the medium. Essentially, they’re a cool way to share art and challenge yourself to make your art on a tiny scale.

Drop In and Hang Out: Stress S.O.S. Kits

image1

It’s beginning to look a lot like finals time. The teens in my library are, on the whole, pretty academically motivated. They’re much more likely to be hanging out in the teen area doing homework than just hanging out. So, finals and midterms tend to really stress them out – they want to do a good job! I thought it would be nice to put together some stress relief kits for them.

Here’s what each kit contained:
Mini Hershey chocolate bar
Small piece of bubble wrap
Coloring bookmark
Bag of caffeine-free tea
Card of stress relief tips

I threw all this in a snack-sized baggie.  I also printed some little labels using label paper we had on hand to seal up each bag.

I swiped the bubble wrap from the ILL desk, printed the bookmark and stress relief tips, and threw in some tea I had at my desk. All I had to buy was the Hershey bars, which were about $5 for a family-sized bag. Hopefully they won’t be torn apart for the candy bars too quickly and hopefully they will help some teens feel better.

Drop In and Hang Out: IRL Tetris

easy-irltetrisThis program was inspired by a pin from of a huge Tetris board on a person-sized flannel board. I knew there was no way to replicate that in our space (we have a huge chalkboard and a huge magnet board, but no felt board…) I wanted to make it work, though, so I set to Googling powers to work. I ended up a From ABCs to ACTs, which had some really nice printable Tetris pieces available. I printed them and laminated them, then stuck small pieces of velcro on the back. Finally, I whipped up a sign challenging teens to team up with a friend to play. The children’s department loaned me one of their portable flannelboards and I was done.

img_4757

Drop In and Hang Out: Altered Magazine Art

altered magazine art

What up, guys! I haven’t been blogging, but I’ve been doing programming for the past year. I thought it’d be time to dive back in to filling the world in on what I’m doing.

I was browsing the internet the other day when I spotted a link to a post on Spontaneous Art Activities for Teens over at Expressive Art Workshops. I loved a lot of the ideas, and I definitely have a lot of artistic teens who hang out in our teen area.

So, I visited the free magazine exchange in the front of the library, and was delighted that there were some National Geographics up for grabs. I snagged a few and went ahead and cut out some pages to use. When we leave stacks of magazines back in the teen area for collage purposes, they often get “tidied” by the cleaning staff and thrown away. I discovered that our regular markers and colored pencils don’t really play well with glossy magazine paper, so I also put out some of our pastels. I whipped up a sign inviting teens to leave their art on our teen art board or to take it with them, and viola!

Given how stressed out  a lot of teens are with recent news and current events, having out art supplies that they can use to express themselves is definitely a plus. This is an easy program to do, although it works best in a space where you can leave the art supplies without fear of them disappearing (although if a teen steals art supplies, maybe they need them more than we do…?)

Fan Club, Jr: Star Wars

What We Did:

Hey, have you guys heard there’s a new Star Wars movie coming out this month? Seriously, though, we knew that Star Wars was even hotter than usual, with the crushing buzz of the new movie propelling kids and adults alike into a frenzy. Courtney wanted to make Chewbacca bookmarks and BB8s out of Model Magic, and I thought we’d through in perler beads, too (we have a ton of them, kids like them, and they’re super easy). Courtney also had the brilliant and adorable idea of making some Death Star Crunch treats, simply by taping a Death Star on a delicious Little Debbie snack cake.

What I Bought:

$8 for one pack of Model Magic
$4 for two packs of Star Crunch

That’s it! We have tons of perler beads on hand, and we also have a lot of duct tape, craft sticks, and brown felt that we made Chewie bookmarks out of.

How It Went:

We accidentally counter-scheduled one of the many downtown festivals in our area with this program, but we still had about 12 kids come out for this. We put on a DVD of Lego Star Wars, and the kids went crazy making all kinds of cool stuff. We simplified the bookmark by simply having them wrap the felt around the large Popsicle stick and making Chewbacca’s face and bandolier out of duct tape. Easy peasy lemon squeezy. The Model Magic is just perfect for making a BB8, but definitely put out markers for the kids to decorate their creations. Otherwise it just looks like they’re making some adorable snowmen.

Art Afternoons: Beth Krommes Scratch Art

2015-10-06 [Art Afternoons - Beth Krommes Scratch Art]

What I Did:

Oops, I did this program several months ago and forgot to blog about it. Anyway, I love Beth Krommes gorgeous picture books, especially Swirl by Swirl  – I just adore the idea of highlighting something so common and yet overlooked in the natural world. When I first thought of using her as inspiration for an Art Afternoons program, I thought her work was done with prints – perhaps woodcut? Nope, she uses scratchboard, which is a super fun thing to experiment with! So that’s what we did, too!

What I Bought:

$4 for 100 scratch art sticks
$4 for 50 Artist Trading Card sized scratchboards
$18 for 40 8.5″x11″ scratchboards

$26 total for a program with a registration cap of 30

How It Went:

This was a fun Art Afternoons, but we definitely had some challenges. The scratchboard sticks didn’t really do a very good job of scratching off the scratchboard. I ended up pulling lots of random stuff from our craft closet – pipe cleaners, jewelry tools, sewing needles, and other scratchy stuff. I let the kids pick their tools.

It also doesn’t take very long to scratch art, so we put out watercolors for the kids to optionally paint their works afterward. This creates a really cool effect.

If you try scratch art at your library, make sure to talk warn your program attendees that they only get one large paper and one small paper (or however much you opt to give them) to use. Lots of kids are used to diving right in and then asking for another paper, which definitely works for some media, but not scratchboards.

This was also a relatively expensive program. Not breaking the bank, exactly, but definitely required more specialized stuff than I would prefer.


Fan Club: The Hunger Games

may the odds

What We Did:

I must admit that this is one of our last weekly programs that I actually had much to do with. As our Youth Services Tech Courtney settles into her new position, I’m transitioning a lot of our regular teen programs over to her. I’m focusing more on long-term planning, the volunteer program, programs for tweens, special programs, and collection development.

Anyway, I think Hunger Games was my idea, but she really ran with it and it was great! We made paper rose pins and pencil arrows. To make the paper flowers, Courtney made a template of three different sized flowers. The teens traced the template three times each, then cut out the flowers. You staple the flowers in the middle, and then just scrunch up the petals for a 3D effect. Finally, we dipped the edges of the petals in red paint, to give it an extra President Snow feel. Teens could then attach a sticky bar pin to the back, so they could wear it.

For the arrows, Courtney was originally inspired by a post she saw that involved gluing feathers to pencils. We tried it, and it’s super hard to glue feathers to pencils, guys! We ended up using duct tape, which was much easier and actually allowed for so many more colors. You just wrap the duct tape around the pencil’s end, making little flaps in several places by sticking together part of the duct tape. Then, you cut the flaps into a feather shape, and voila! If you have teens who are particularly crafty or bored, they can also make a little mini-quiver from duct tape.


What We Bought:

$5 for a pack of plain colored pencils for the arrows

That’s it! We had everything else on hand!

How It Went:

I made a playlist of Hunger Games parodies, interviews, and fan interviews, and we hung out for a while with some teens!  As usual, the teens actually care less about the crafts than they do about hanging out. It was a fun program, and I’m glad we kept it pretty low-key. I think either of these crafts would actually work really well as a passive program, too!